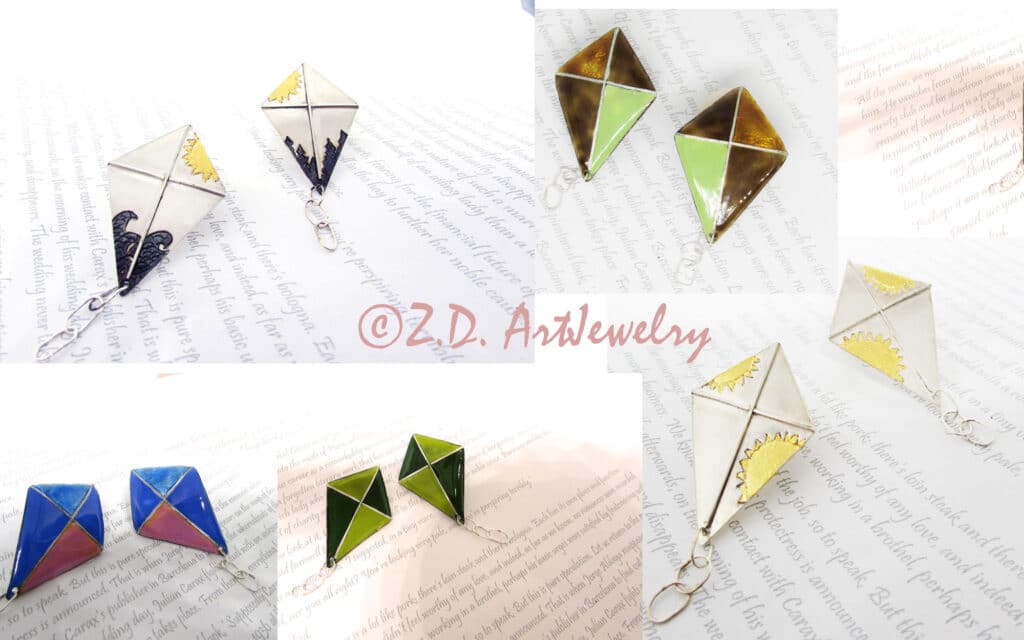

This post is about my project to make kite earrings. I have made these earrings due to my interest in kites. They are symbol of childhood and freedom for me. Hence, I have decided to write about this project and the making process. I have made some of kites in silver and some in copper with silver wires and I have enamelled them later. I have a video to show the steps of creation process.
For the silver ones, I use sheets with 0.6mm thickness. But for the copper ones, I use 1mm thick sheet, because I want to enamel them and according to my experience, the sheets thinner than 0.8mm are not suitable for several layers of enameling. They will warp and deformed after few layers. After cutting, I anneal them and punch a hole for each one to hand the tails!
I have chased the silver ones after cutting the blank using a liner and a hammer.

I used both square wires and round ones and I prefer square ones for this purpose. It will make a difference in look!

I have recorded the soldering process in the video. I use hard silver solder. In the moment I see flash of melting silver I would turn the torch off. Otherwise wires will get melted. I have melted the silver wires several times!

I solder them and then pickled the whole kite.

I ball up the ends of 0.8mm sterling silver wires by direct heating.

Then I file them and make a flat side.

Finally, I solder them on the back of earrings

I first counter enamel them (3 layers) and fire using the torch. Counter enamelling means enamelling the back of pieces and it is usually required to prevent warpage. I know that most of people counter-enamel their pieces at the same time of the surface of metal. But I found that when I do it before starting to enamel the surface, the piece will maintain its form better! And I usually torch-fire my counter enamels. I am not too picky about the enamels on the back of pieces and I use any enamel available or sometimes mix of enamels. I pickle the surface and give it a light polish as well!

I apply white (wet laying). Next, I fire it at 785 -790 degrees Celsius

In this project, I usually use opaque colours. I have also fused a layer of silver foil and applied transparent enamel to two pairs of my kites to give them some depth.

I grinded the enamel surface using 400 grit diamond polishing pad and fired them to fuse the enamel completely. I also clean and polish the edges.

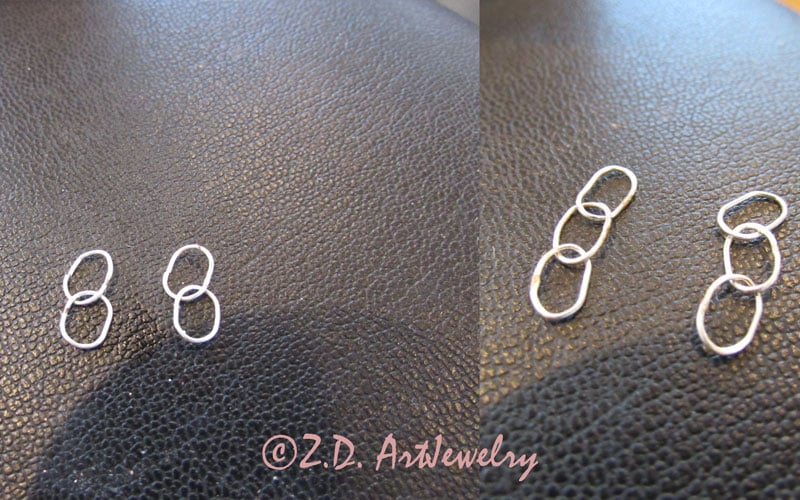
I used 0.5 mm fine silver wires. I cut them in equal lengths.

And subsequently, solder two ends together. I am not concerned to shape them before soldering. After soldering, I use a pen to make them circular.

Later, using flat-nose plier, I elongate the links a little.

Then, I cut two links and string an open link through two closed (soldered) links, flux and solder the open link. Finally, I hang them to the hole I already punched on kites and here they are, my kites in various colours and patterns!
